May 29, 2018 By Team YoungWonks *
Using a breadboard is a key step in electronics. Once one has made the correct connections on a breadboard, current will flow through it and by writing the right code, one can use that power to carry out a series of electronic tasks such as lighting an LED (light-emitting diode). In this blog, we shall answer the basic question: how do you use a breadboard?
What is a Breadboard?
A breadboard is named after a bread board, a polished piece of wood used for slicing bread; it is a board used for prototyping in electronics. This means that it is used for making experimental models of electronic circuits. In other words to build and test an early version of an electronic circuit, using components such as battery, switch, resistor, and an LED. One can use it for fun electronics projects, be it robots, home automation systems or even weather stations to name a few instances. It is essentially a rectangular plastic board with several tiny holes in it.
Making Connections on a Breadboard
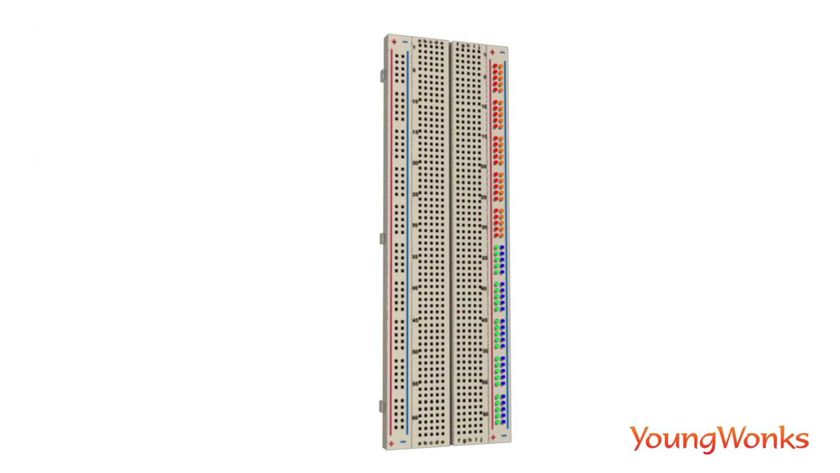
If you refer to the 3D video rendering of a breadboard, you’ll see that: 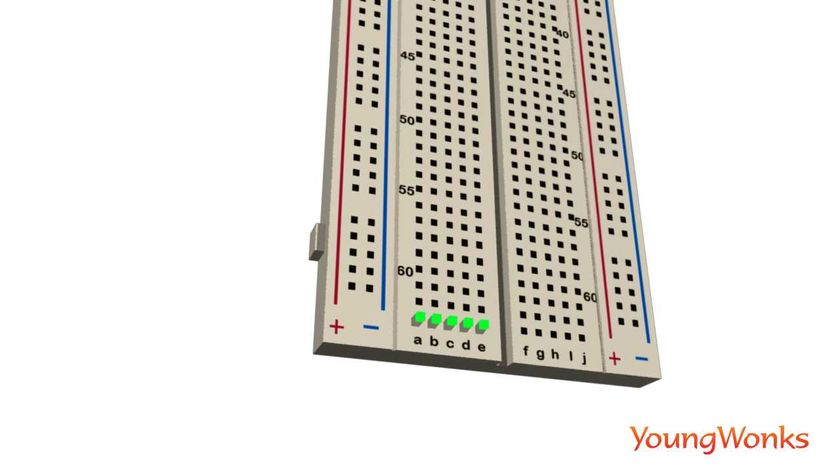
- Holes in the same row on a breadboard are called socket strips and electricity can flow through the row as these holes are connected to each other with a conductive metal.
![breadboard bus strips]()
- The vertical rails on the breadboard, called bus strips, are also connected by a conductive metal; they supply power to the circuit.
![breadboard and battery]()
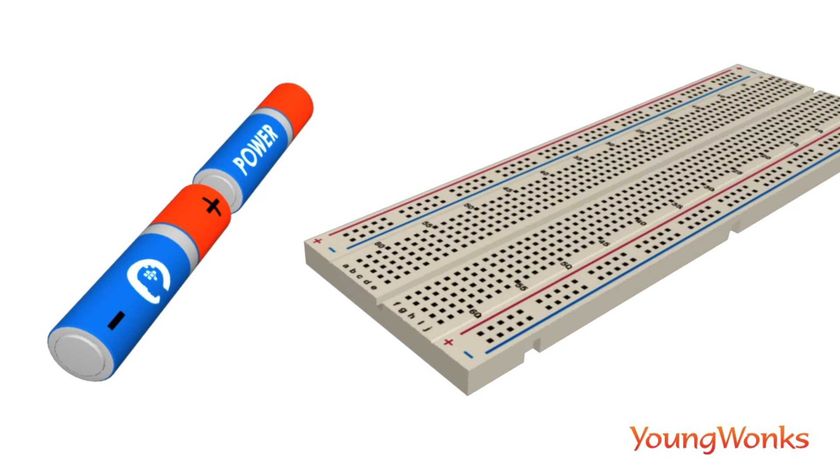
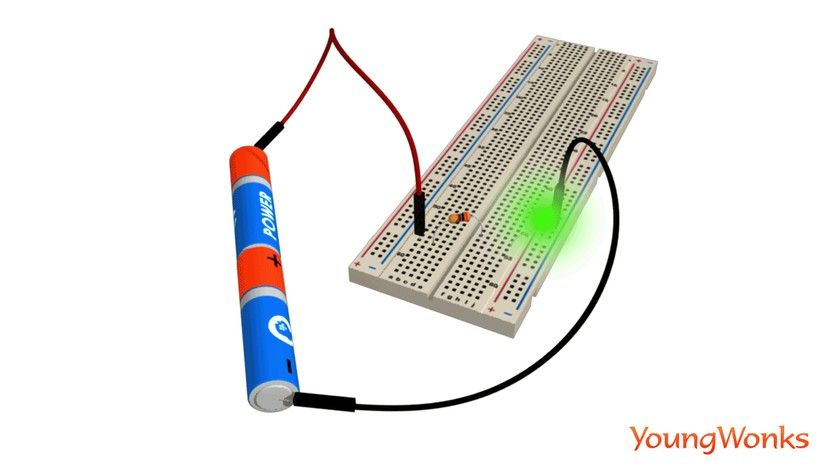
- When the circuit is complete, current will flow from positive terminal (also called power) to a negative one (ground). In this circuit, batteries are the power source.
![breadboard with led connected]()
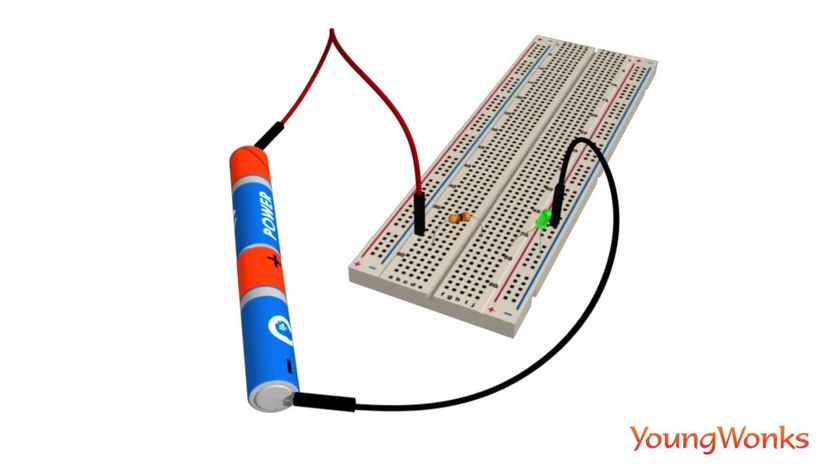
- A complete circuit is one where each of the components are in contact with the other either directly or through breadboard strips.
![breadboard battery connected]()
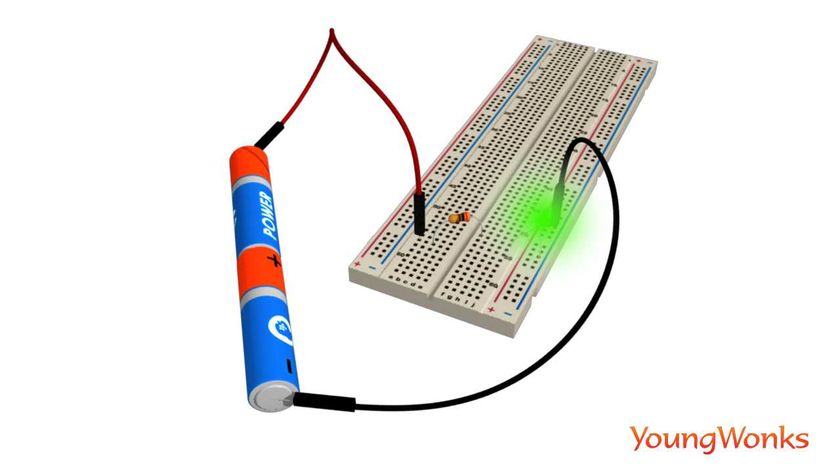
- The flow of current through the circuit causes the LED to light up.
Breadboard Dos and Don’ts
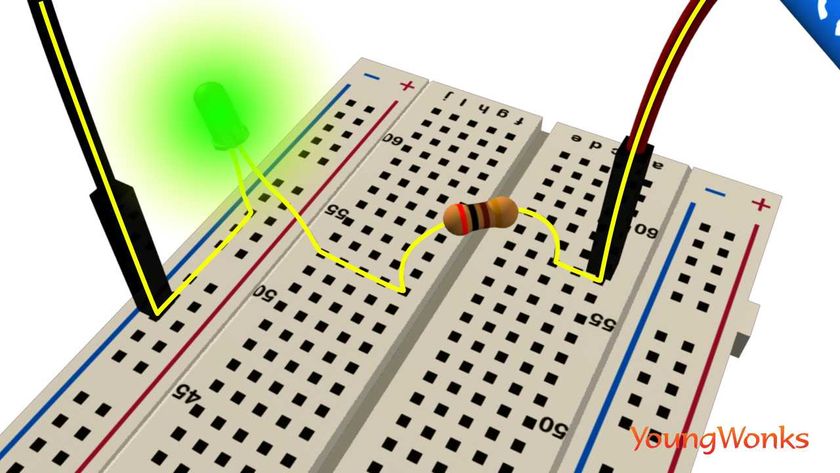
1. The power and ground should never be directly connected to each other. Direct connection leads to a short circuit. One must always use a resistor (as shown) to regulate the flow of current. Here the yellow line denotes the current path.
2. Always connect the batteries (power supply) to your circuit last. This will give you a chance to double-check your connections on the breadboard before you turn on your circuit for the first time.
Expand Your Child's Tech Skills
For young enthusiasts eager to further their understanding of technology and electronics, YoungWonks offers specialized Coding Classes for Kids that focus on the core principles of innovation and design. These classes provide an excellent framework not only for breadboarding projects but also for programming languages and hardware platforms. If your child is particularly interested in venturing into more specific areas, our Python Coding Classes for Kids are designed to teach them one of the most versatile programming languages today. Additionally, for those intrigued by physical computing and hardware projects, our courses on Raspberry Pi, Arduino, and Game Development Coding Classes seamlessly integrate coding with hands-on electronic projects, fostering a well-rounded understanding of both the software and hardware aspects of computing.
*Contributors: Written by: Vidya Prabhu; 3D video rendering and images by: Leonel Cruz
