Apr 19, 2018 By Team YoungWonks
How can one blink an LED (Light-Emitting Diode) with a Raspberry Pi? Before we know the answer to this, it is important for us to know this: what is a Raspberry Pi? The Raspberry Pi, to put it simply, is a series of small single-board computers developed in the United Kingdom by the Raspberry Pi Foundation to promote the teaching of basic computer science in schools. It has become hugely popular today and most coding classes have students starting their lessons by using a Raspberry Pi.
In this blog, you’ll learn more about how to blink an LED (Light-Emitting Diode) using a Raspberry Pi.

Step 1: To blink an LED using a Raspberry Pi you need you to know the basics of an electrical circuit. For instance, you need to know that in an electrical circuit using a battery as a power source, one end of the LED is connected to the positive terminal of the battery using a breadboard and other end is connected to the negative end of the battery for the LED to turn on.

Step 2: Instead of using a battery as a power source, you can, in fact, turn on the LED by connecting its ends to the 3V3 (positive) and negative (ground) pin of the Raspberry Pi. Like in the previous circuit, the use of a resistor is recommended; this will help regulate the flow of current and avoid damage to the LED.

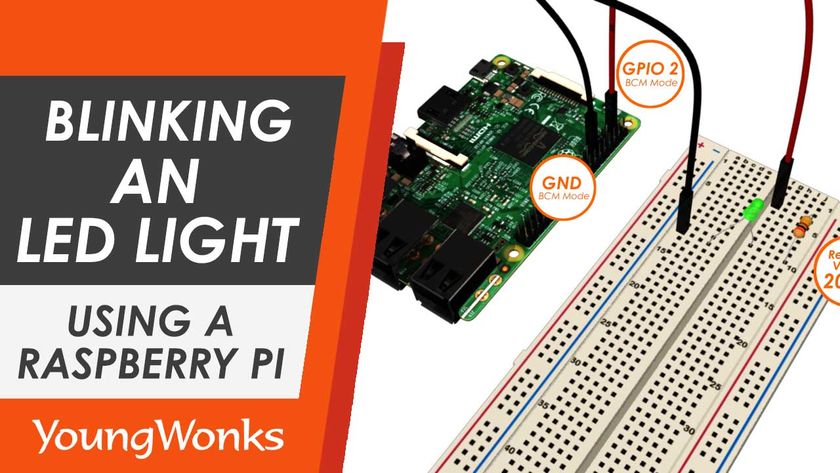
Step 3: The next step is where you go on to actually connect the anode of the LED (its longer lead) to one of the GPIO (General Purpose Input/Output) pins of the Raspberry Pi. This allows you to control the value of one of the pins by setting it high or low.

Step 4: This is where we begin coding. It begins with importing the RPi.GPIO module and using it to do the Raspberry Pin’s GPIO pin setup. For this, you need to open the Python interpreter, import the module and write code to select the correct mode: BCM Mode or BOARD Mode. YoungWonks recommends the BCM Mode.

Step 5: The pin setup stage needs one to write code that defines whether a particular pin on the Raspberry Pi is used as an input pin or an output pin. Make sure you use the BCM number of the pin while doing this.

Step 6: The GPIO output stage is where you write the code to turn the pin on and off. Use the time module to account for a small interval of time between the LED switching on and off, as this will make the blink more noticeable.