Mar 11, 2021 By Team YoungWonks *
How can one use an RGB LED with the Raspberry Pi Pico? With the Raspberry Pi Pico now available in the market, many may have this query now. In this blog, we shall take a look at writing a program to use an RGB LED with the Raspberry Pi Pico.
What is Raspberry Pi Pico?
Raspberry Pi refers to a series of small single-board computers developed in the United Kingdom by the Raspberry Pi Foundation in association with Broadcom. The boards have been made keeping in mind the promotion of teaching basic computer science to kids. The latest offering by Raspberry Pi is the Raspberry Pi Pico, a new flexible IoT board. Essentially, it is a microcontroller board built on silicon and designed at the Raspberry Pi Foundation.
Priced at merely $4, Raspberry Pi Pico is smaller than the average Pi and indicates how the foundation is now looking to branch out into microcontrollers and custom silicon.
Raspberry Pi Pico pinout
In order to use it well, it is recommended to get well acquainted with the Raspberry Pi Pico pinout. The diagram below explains this. 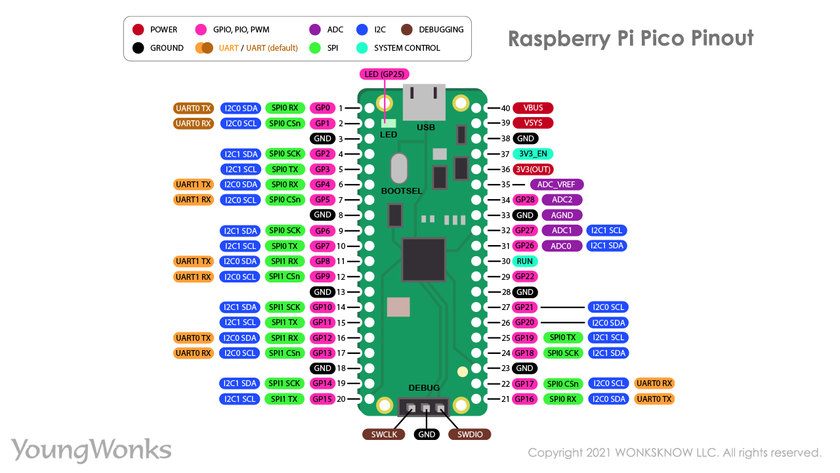
Raspberry Pi Pico projects
As a microcontroller, the Raspberry Pi Pico can be used in many projects, be it Internet of Things (IoT), Adafruit Neopixel projects, data logging, small to medium scale robotics, projects needing interfacing with cameras, analog sensing (using environment sensors) and more.
Using an RGB LED with a Raspberry Pi Pico
Now we are going to learn how to use an RGB LED with a Raspberry Pi Pico.
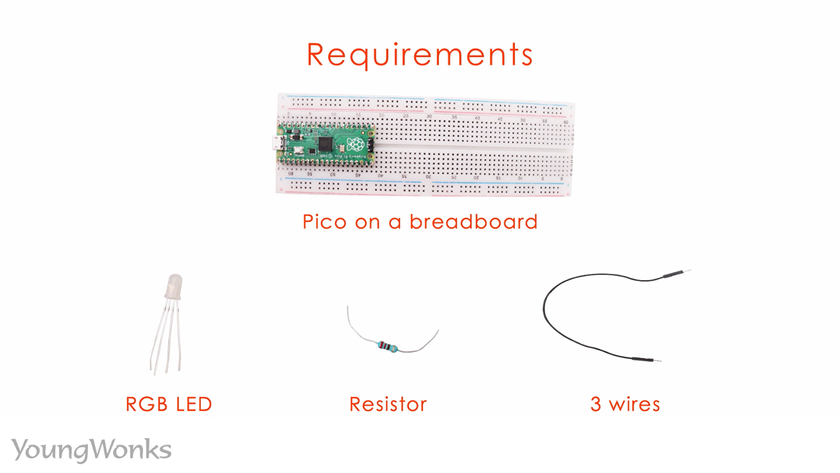
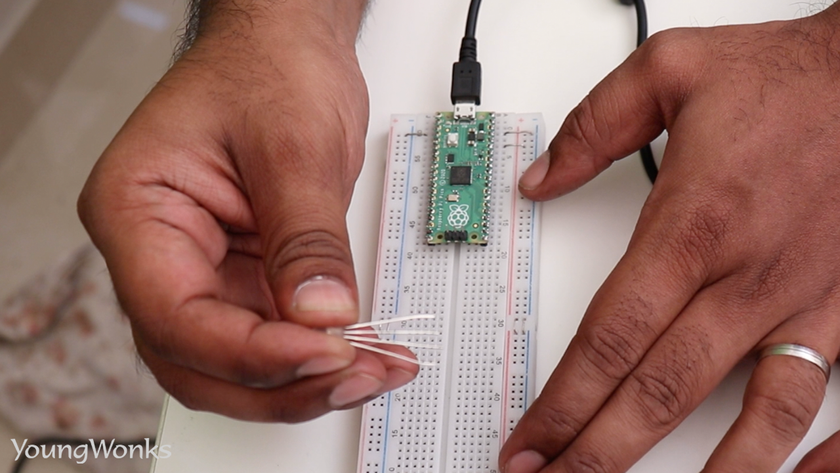
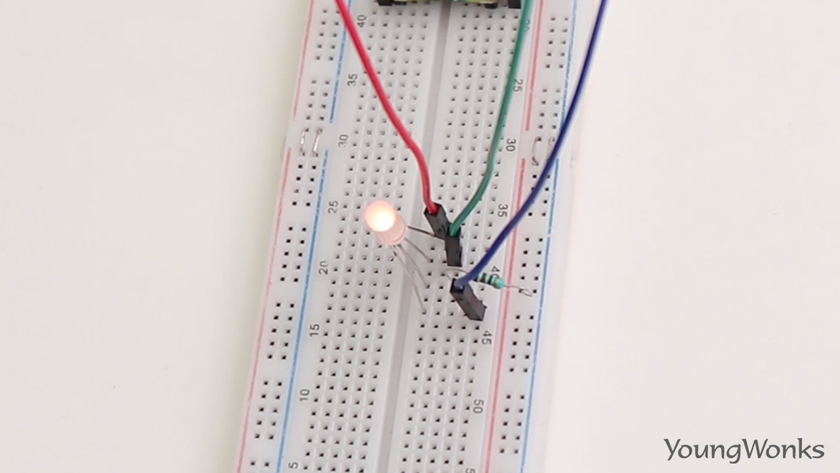
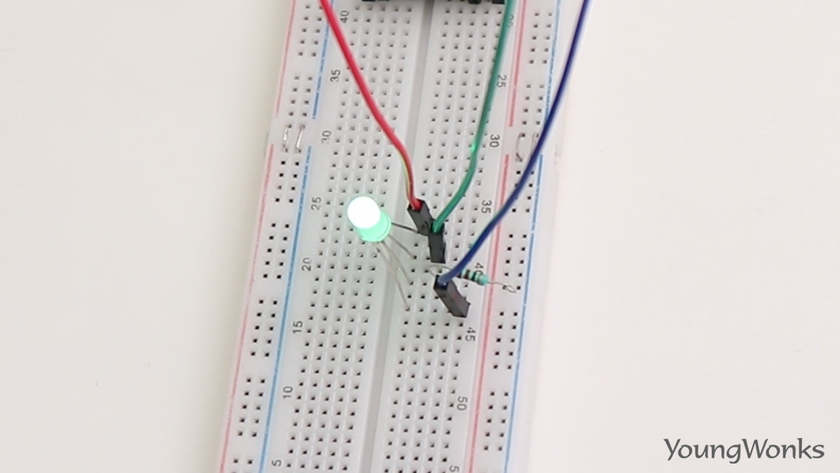
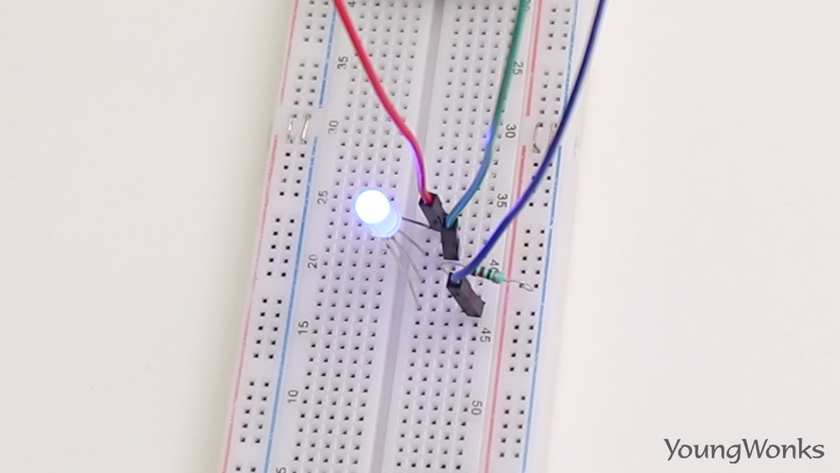
To begin with, we shall need a breadboard with a Raspberry Pi Pico on it, an RGB LED, a resistor and three wires.
Take a look at the circuit diagram to help you build a circuit.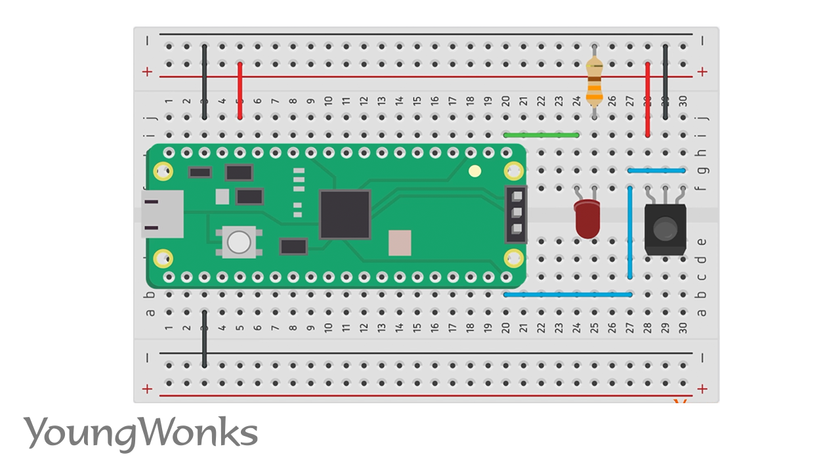
A wire circuit is also useful while building a circuit.
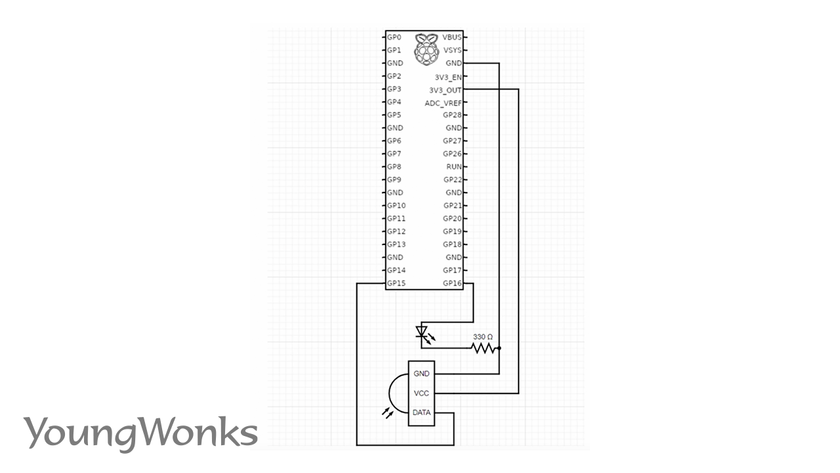
Next we plug in an RGB LED; one could use a common anode or a common cathode. Here we are using a common anode.
We then connect the common anode with the VCC (Voltage Common Collector, the higher voltage with respect to GND (ground); aka the power input) through a resistor.
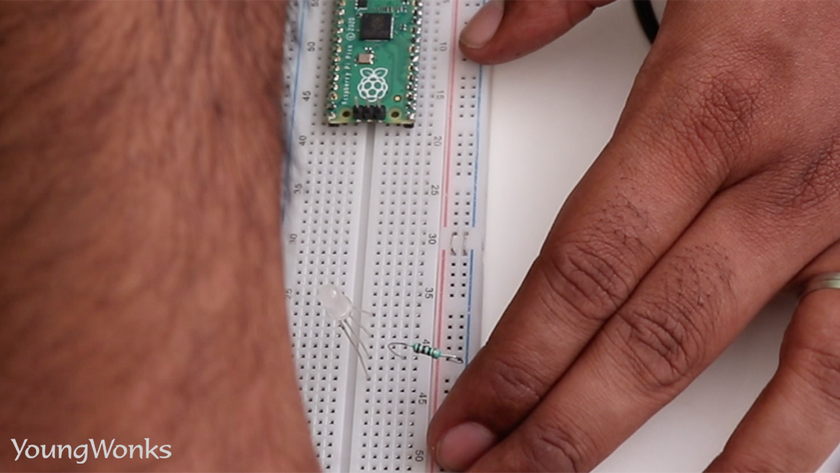
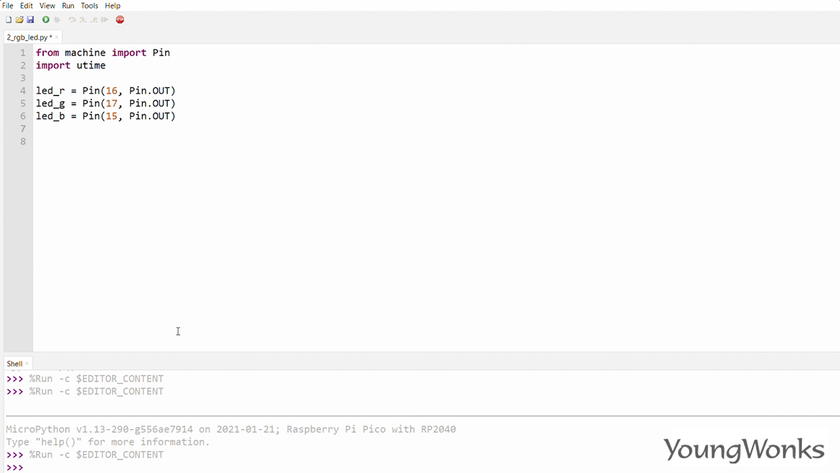
We connect the other three terminals to the three GPIO pins configured as outputs. 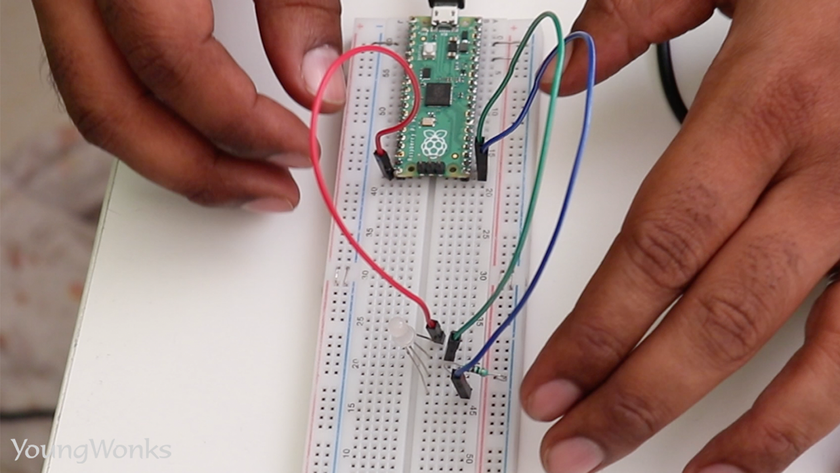
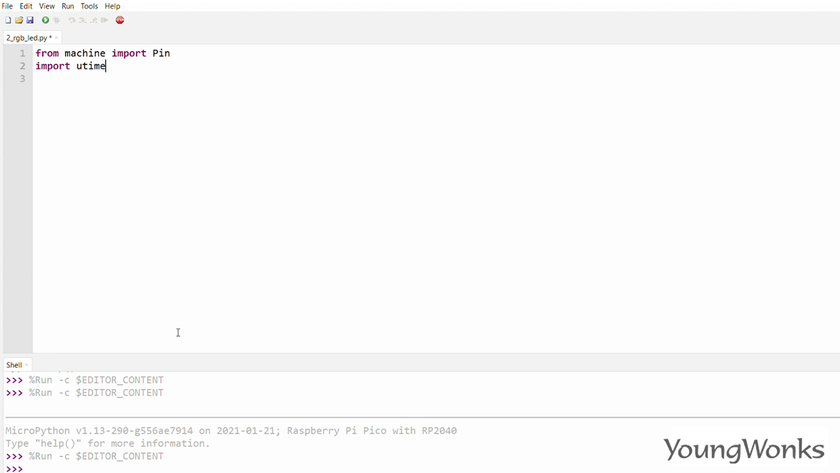
Now let’s get down to the code. We first import the library and configure the pins as outputs.
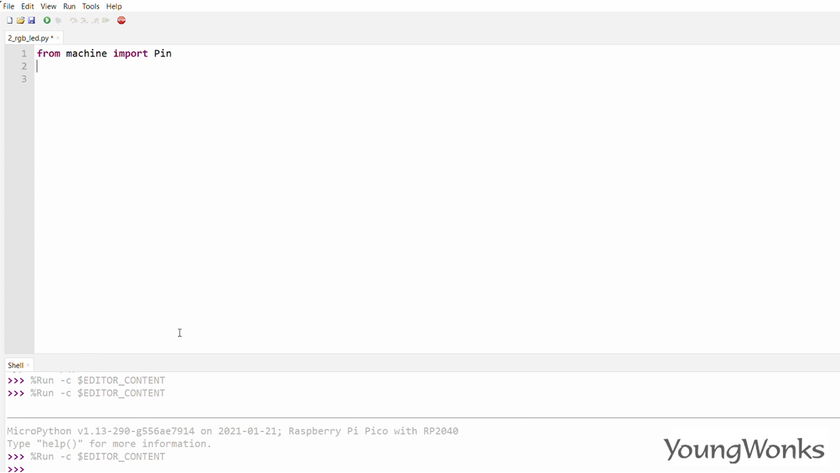
The time library is also useful to add delays between the switching of the lights.
We have three pins controlling three of the LEDs of the RGB LED so we write the code accordingly for each.
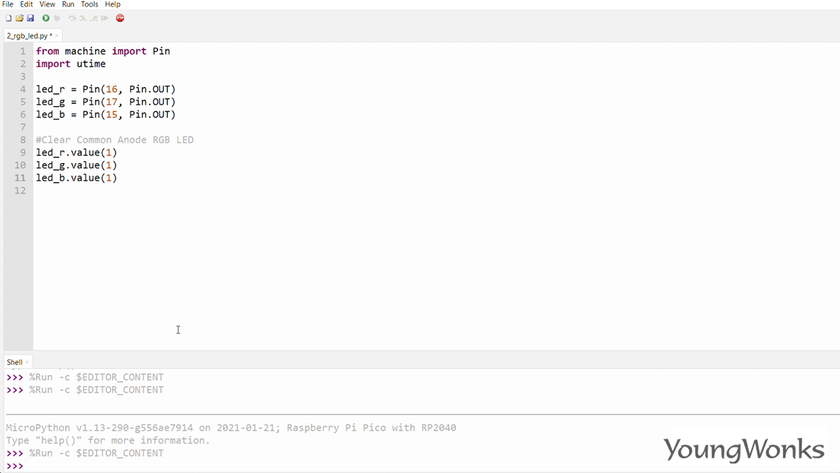
We then clear all the LEDs and in case of common anode, we would set them all to 1. (In case of the common cathode, we need to set them all to zero.)
Next we create a while true loop, where we toggle each LED one by one. We also add time delays in between them for us to be able to see this change of color.
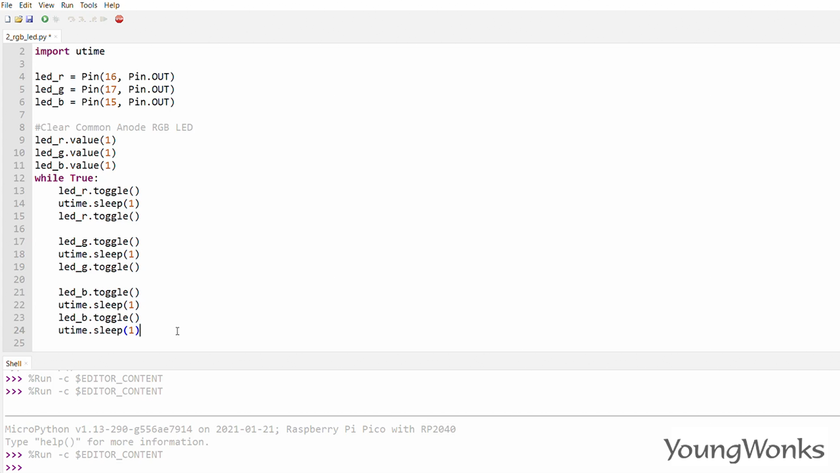
As you can see, the lights switch between red, green and blue; there’s also a delay of one second between them.
You can watch the video below to take a quick look at how one can work with the newly launched Raspberry Pi Pico and an RGB LED:
Enhance Your Coding Skills with YoungWonks
If your child is keen on mastering the realms of technology and coding, look no further than Coding Classes for Kids at YoungWonks. We offer specialized Python Coding Classes for Kids that tailor to the needs and expertise levels of young learners, ensuring they gain a firm grasp of one of the most widely used programming languages today. Furthermore, with our comprehensive Raspberry Pi, Arduino and Game Development Coding Classes, students not only learn about hardware programming with Raspberry Pi and Arduino but also venture into the exciting world of game development. These immersive courses are designed to harness and elevate the innate curiosity and creativity in kids, setting a strong foundation for their future in tech.
*Contributors: Written by Vidya Prabhu; Lead image by: Leonel Cruz