Apr 01, 2021 By Team YoungWonks *
How can one control a 7-segment LED display with the Raspberry Pi Pico? In this blog, we shall look at this. But before we go into that, let’s look at what a 7-segment LED display is. Also written as the ‘seven segment display’, it comprises seven LEDs (from where it gets its name) arranged in a rectangular fashion. Each of the LEDs is called a segment because when illuminated the segment forms part of a numerical digit (both decimal and hex) to be displayed.
Next let’s take a quick look at the Raspberry Pi Pico.
What is Raspberry Pi Pico?
Raspberry Pi refers to a series of small single-board computers developed in the United Kingdom by the Raspberry Pi Foundation in association with Broadcom. The boards have been made keeping in mind the promotion of teaching basic computer science to kids. The latest offering by Raspberry Pi is the Raspberry Pi Pico, a new flexible IoT board. Essentially, it is a microcontroller board built on silicon and designed at the Raspberry Pi Foundation.
Priced at merely $4, Raspberry Pi Pico is smaller than the average Pi and indicates how the foundation is now looking to branch out into microcontrollers and custom silicon.
Raspberry Pi Pico pinout
In order to use it well, it is recommended to get well acquainted with the Raspberry Pi Pico pinout. The diagram below explains this. 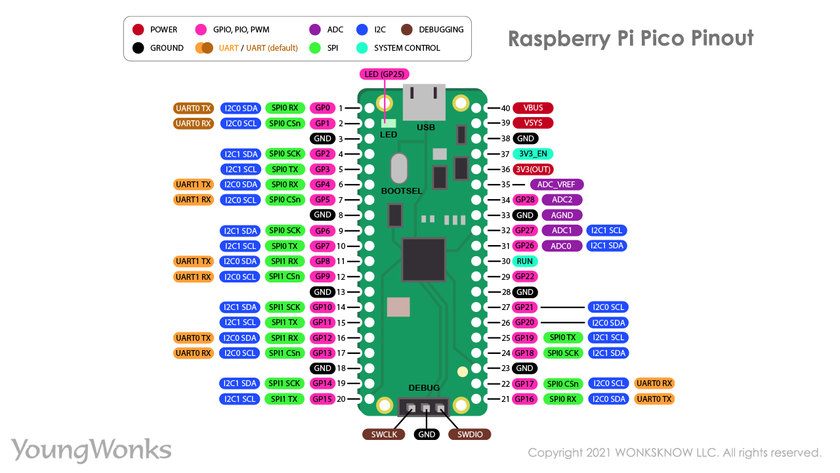
Raspberry Pi Pico projects
As a microcontroller, the Raspberry Pi Pico can be used in many projects, be it Internet of Things (IoT), Adafruit Neopixel projects, data logging, small to medium scale robotics, projects needing interfacing with cameras, analog sensing (using environment sensors) and more.
Using a 7-segment LED display with a Raspberry Pi Pico
Now we are going to see how to control a 7-segment LED display with a Raspberry Pi Pico.
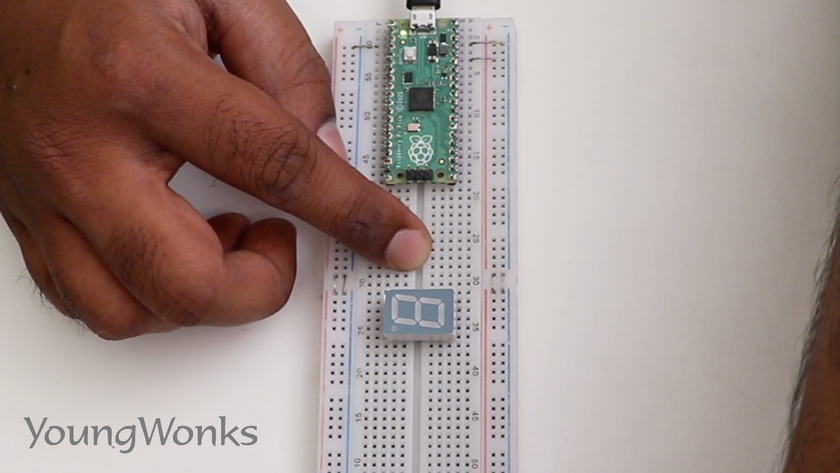
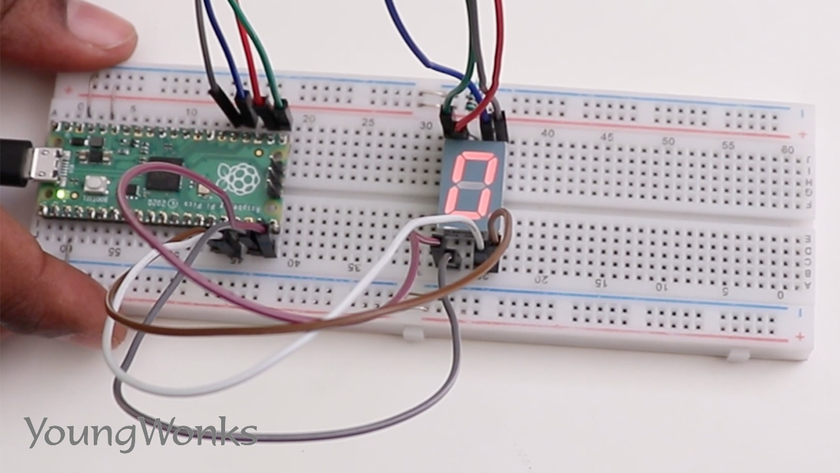
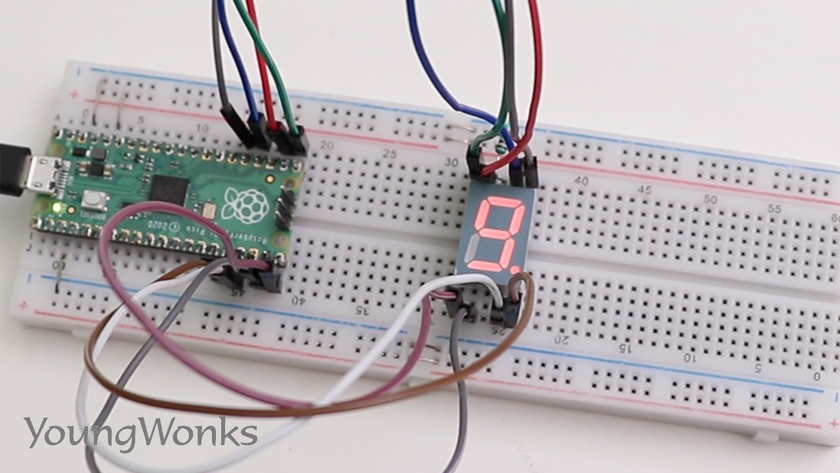
To do this, we need a Raspberry Pi Pico on a breadboard, a 7-segment LED display, a resistor and eight wires. 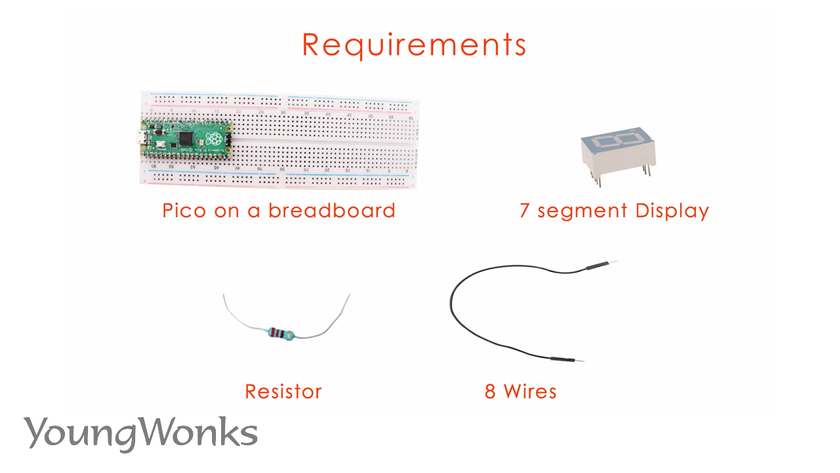
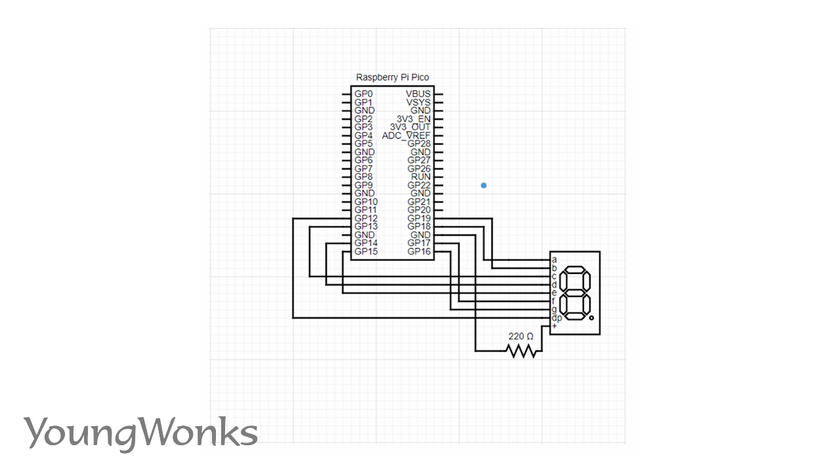
Take a look at this circuit diagram to help you make your connections and build a circuit. 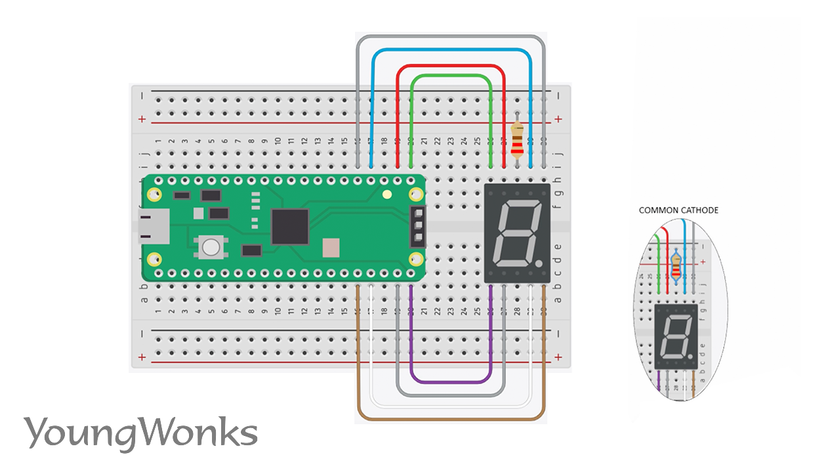
You can also verify your connections using the wire circuit diagram shown here.
First we plug in the 7 segment display on the breadboard.
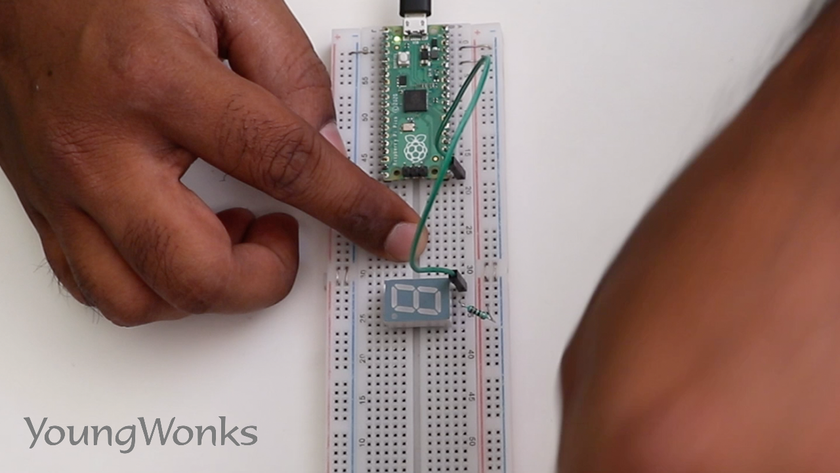
Next we connect the resistor to the positive end (in our case since we have the common anode).
You can also use the same principle for the common cathode by connecting common to the negative.
Now connect the 8 wires to the 8 corresponding pins of the 7 segment LED display. You can use GPIOs configured as outputs to control them from the Raspberry Pi Pico. 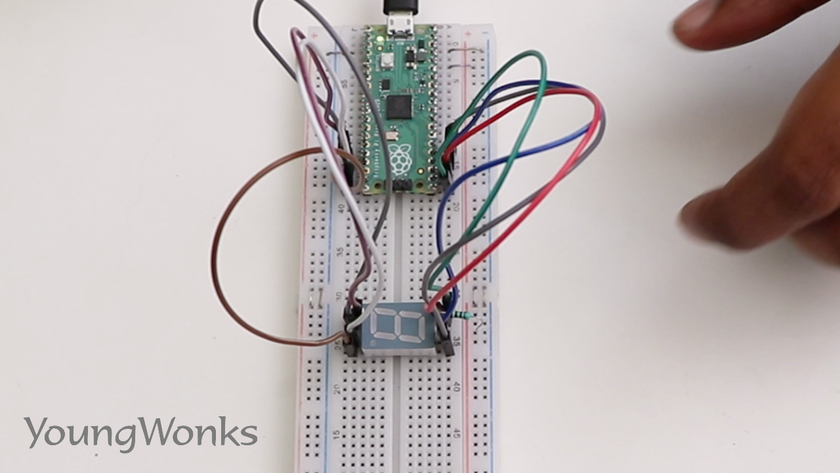
Once the connections are made, we get down to the code.
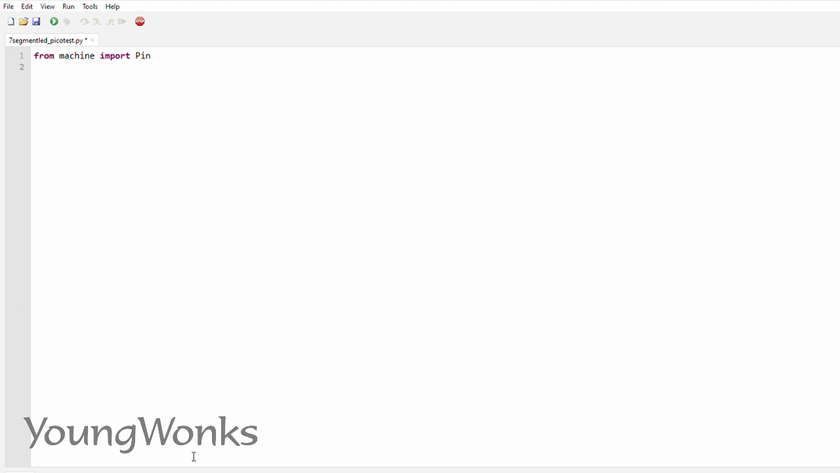
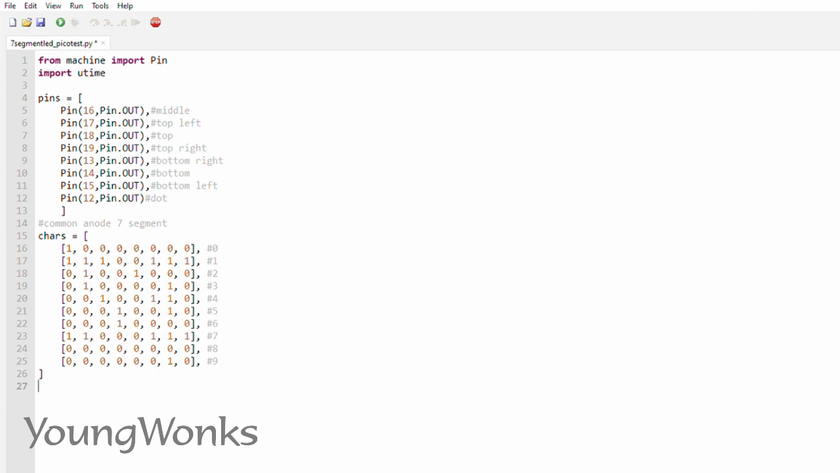
As usual, we begin by importing a pin module from the machine library.
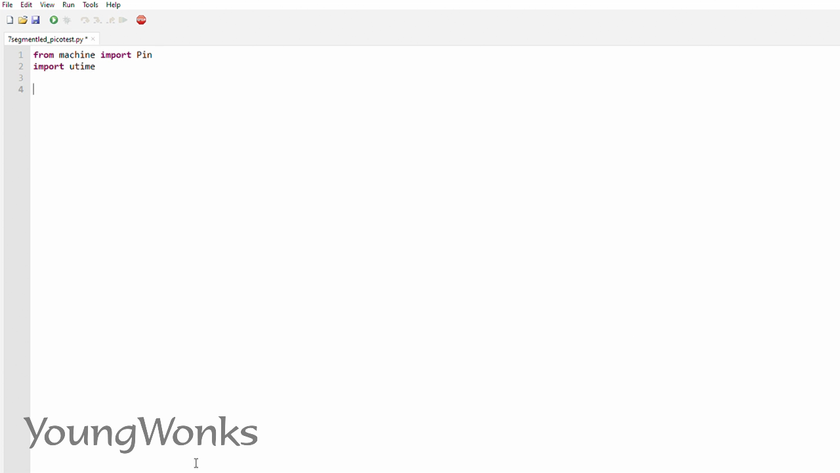
We are also going to have utime to add some delay.
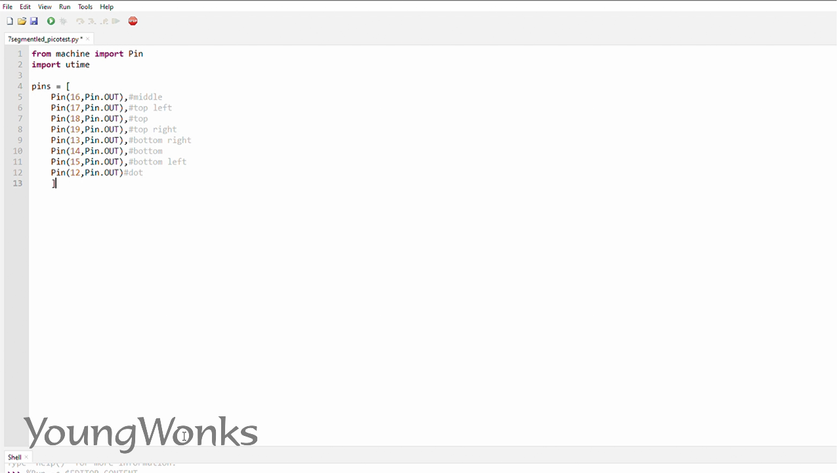
Now we are going to make a list of pins and it would be a good idea to add comments so that we know which pin controls which segment. Overall, we shall have 8 pins, 7 of them are for displaying the numbers and one controls the dot.
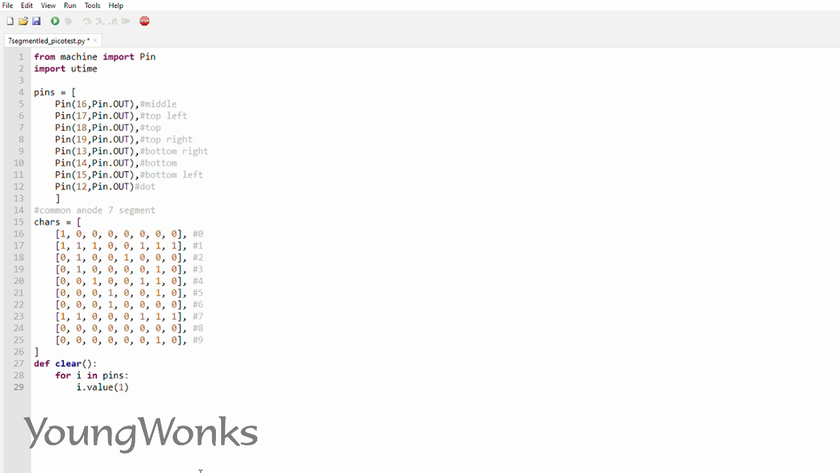
Having configured each one of them to be outputs, the next step is to try to see if we can cycle through different numbers of the display. For each character, we have a list of values to be applied to each one of the pins. Because ours is a common anode, setting pins valued to zero is what turns on the 7 segment LED display. If you were to use a common cathode, you would flip it and setting it to one would turn it on instead (with setting it to zero turning it off). We now go ahead and create multiple lists responding to each one of the numbers. We can also display some alphabetical letters on this as well (though we haven’t tried it here).
We will also make a function so that we can clear the display. It basically sets all the pins to 1.
Now in a loop, we are going to iterate over each of the characters and use each of the values and set them to each one of the pins. Then we wait a second before we move to the next character.
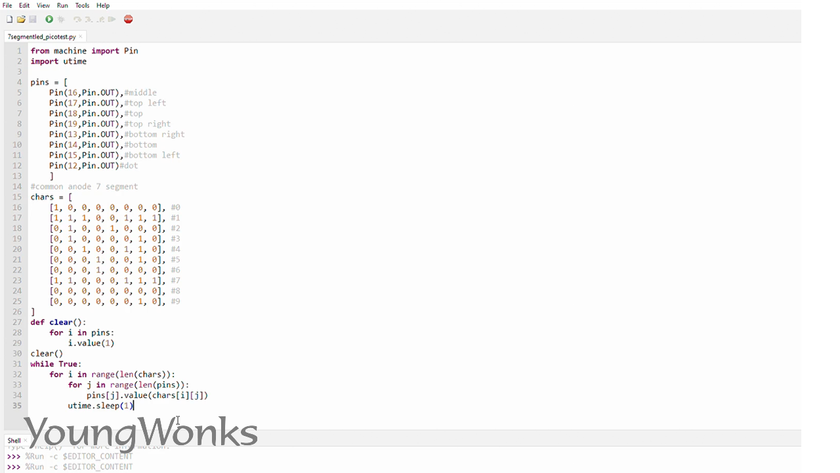
Now we can see that our numbers step through one at a time from 0 to 9.
You can watch the video below to take a quick look at how one can use a 7-segment LED with a Raspberry Pi Pico:
Enhance Your Learning with Specialized Courses
For those who are excited by the prospect of combining electronics and programming through projects like using a 7 segment LED display with the Raspberry Pi Pico, further exploring and mastering these skills is crucial. At YoungWonks, we offer a variety of Coding Classes for Kids designed to introduce and deepen understanding of software development and hardware integration. Specifically, our Python Coding Classes for Kids provide a solid foundation in one of the most popular programming languages used today, which is critical for Raspberry Pi projects. Additionally, for students interested in exploring more about hardware projects, our Raspberry Pi, Arduino and Game Development Coding Classes offer comprehensive guidance on creating exciting projects that combine coding with physical computing and game development, making learning both fun and educational.
*Contributors: Written by Vidya Prabhu; Lead image by: Leonel Cruz